How to Install Git on Ubuntu 18.04
The easiest way for installing Git on your computer is visiting the page Git downloads and choosing download for Linux where the latest stable upstream Git version is provided. Also, read how to Install Git on Mac and on Windows.
Install Git from Repository
First step is to open a terminal window.
- Copy and paste the following into the terminal window and hit Enter. You may be prompted to enter your password. With the update complete, you can download and install Git:
sudo apt updatesudo apt-get install git - To confirm that you have installed Git correctly run the following command:
git --versionThe output will be like this:
git version 2.17.0
- Now it’s time to set your personal information. Enter the following commands to add your name and email:
git config --global user.name "W3docs" git config --global user.email [email protected] - As you configure the reference into Git, you can open a Git configuration file where you will come up with the user details like this:
[ .. ]
[user]
          user.name=W3docs
          [email protected]
[ .. ]
Install Git from Source
In case you wish to install the latest git version you will have to install Git from the source code.
Compiling the software from source is a more flexible method for installing Git. This method will take longer time, but it will allow you to download the latest release and will give you some control over the options.
- Before you start, you have to install the software that Git depends on. So you can update your local package index and then install the packages.
sudo apt updatesudo apt install make libssl-dev libghc-zlib-dev libcurl4-gnutls-dev libexpat1-dev gettext unzip - Next, by visiting the Git Source Code Mirror choose the version of Git you want.
- Choose "master" branch then click on the "Tags" list and select your preferred Git version.
Avoid choosing release candidate (RC) versions, because they may have an unstable nature.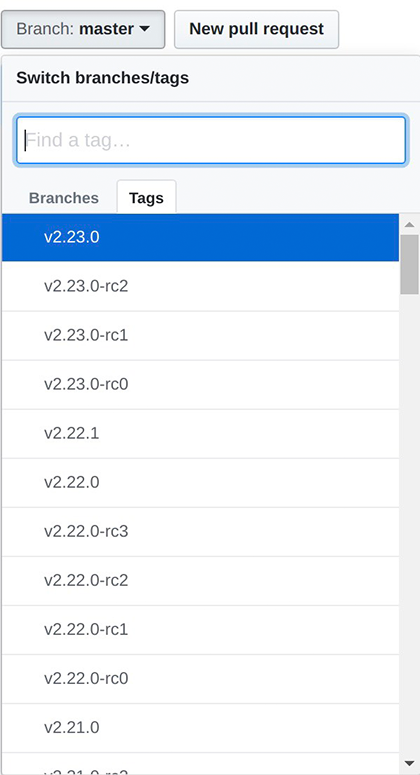
- Then, click on "Clone or download" which will open a new window. Right-click on "Download ZIP" and choose "Copy link address."
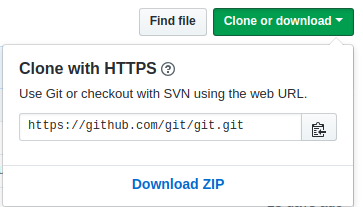
- After that, go back to your terminal, set the wget command for downloading Git zip package using the copied link download address. It will be like this:
wget https://github.com/git/git/archive/v2.19.0.zip - Unzip the file that you downloaded and move into the resulting directory with the following command:
unzip cd git-2.19.0 - Now you are ready to install Git. Follow these two commands which will compile the formerly downloaded git source code and will install git binaries on your Ubuntu 18.04 Linux system.
make prefix=/usr/local all sudo make prefix=/usr/local install - To confirm that you have installed Git successfully run the following command:
git --version
You will get an output like this:
git version 2.19.0
Now it’s time to set up Git and provide user information by using the git config command:
git config --global user.name "W3docs"
git config --global user.email "info@w3docs.com"
The result will be like this:
user.name=W3docs
[email protected]
...
If you want to see all the configuration items that have been set previously, use the git config command with the --list option. And if you want to change the details you provided, change the settings by editing the main .gitconfig git configuration file located within your home directory.