How to Add Image in the Title Bar
Make your website look more attractive by using favicons in the title bar. See how favicons are created and find more information about them.
Most websites add an icon or image logo in the title bar. This icon logo is also called a favicon and can be useful for user engagement.
A favicon, also known as a URL icon, a tab icon, a shortcut icon, a website icon, or a bookmark icon, is a file containing one or more small icons associated with a particular website or web page.
You can let the browser detect your favicon or upload it to your hosting root area.
W3C standardized favicon in the HTML 4.01 recommendation. The standard implementation uses a <link> element with the <span class="attribute">rel</span> attribute in the <head> section of the document that specifies the file format, file name, and location. The file can have any image format (ico, png, jpeg, gif) and can be in any website directory.
Let the browser find the favicon!
One way, which is the easiest, is by uploading an icon as a <span class="attribute">.png</span> or <span class="attribute">.ico</span> file from your hosting’s File Manager. If you prepare your image in png or ico, you can upload it to your hosting area, and most modern browsers will automatically detect <u>favicon.png</u> and <u>favicon.ico</u> files from your host (naming matters here, it should be exactly favicon). So, you’ll need no coding.
The other way is by using the HTML link inside the <span class="attribute">head</span> tag.
Let's use HTML <span class="attribute">link</span> tag:
How to add shortcut icon on head section to Add an Image in the Title Bar
/* it should be placed inside the head tag */
<head>
  <link rel="icon" type="image/png" href="path-to-your-favicon"/>
</head>If you use a different image format, implement the appropriate changes (read the next paragraph), and change the value of the <span class="attribute">href</span> attribute to the path where your image is located in your project. The ICO format is not as reliable anymore, and it's better to use <u>png</u> (to preserve transparency).
Depending on the favicon format, the <span class="attribute">type</span> attribute must be changed:
- For PNG, use image/png.
- For GIF, use image/gif.
- For JPEG, use image/jpg.
- For ICO, use image/x-icon.
- For SVG, use image/svg+xml.
How to Add an Image in the Title Bar
/* for gif files, for example, it should look like this: */
/* path-to-favicon should be changed to the location of your favicon file */

<link rel="icon" type="image/gif" href="path-to-favicon">A favicon must have the following characteristics:
- Favicon.ico is the default name.
- Size should be 16×16, 32×32, 48×48, 64×64 or 128×128 pixels.
- Color should be 8 bits, 24 bits or 32 bits.
There are a lot of online tools that will help you create a favicon, convert the image formats, etc., and you can find them by a simple search on Google, by the way.
Square dimensions are recommended for proper rendering and a professional appearance. While browsers can technically display non-square images, they may not scale correctly or look professional.
Example of adding an image in the title bar:
Example how to add a favicon to your website
<!DOCTYPE html>
<html>
  <head>
    <title>Title of the document</title>
    <link rel="icon" type="image/x-icon" href="https://www.w3docs.com/favicon.ico" />
  </head>
  <body>
    <h1>Hello from W3docs!</h1>
  </body>
</html>If you take a look at the result of the above code, it should be something like this.
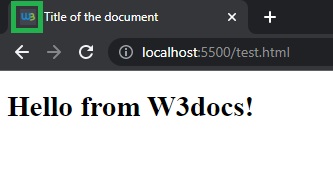
If you do not see the new favicon, clear your browser's cache and restart it.
Different Platforms:
For different platforms, the favicon size should also be changed:
| Platform | Name | Rel value | Favicon size |
|---|---|---|---|
| Google TV | favicon-96x96.png | icon | 96×96 |
| Ipad Retina, iOS 7 or later | apple-touch-icon-152×152-precomposed.png | apple-touch-icon-precomposed | 152×152 |
| Ipad Retina, iOS 6 or later | apple-touch-icon-144×144-precomposed.png | apple-touch-icon-precomposed | 144×144 |
| Ipad Min, first generation iOS 7 or later | apple-touch-icon-76×76-precomposed.png | apple-touch-icon-precomposed | 76×76 |
| Ipad Mini, first generation iOS 6 or previous | apple-touch-icon-72×72-precomposed.png | apple-touch-icon-precomposed | 72×72 |
| Iphone Retina, iOS 7 or later | apple-touch-icon-120×120-precomposed.png | apple-touch-icon-precomposed | 120×120 |
| Iphone Retina, iOS 6 or previous | apple-touch-icon-114×114-precomposed.png | apple-touch-icon-precomposed | 114×114 |
Add it to your code in the following way:
How to add favicon with gif format
<!-- default favicon -->
<link rel="shortcut icon" href="/favicon.ico" type="image/x-icon">

<!-- widely used favicon -->
<link rel="icon" href="/favicon.png" sizes="32x32" type="image/png">

<!-- for apple mobile devices -->
<link rel="apple-touch-icon-precomposed" href="/apple-touch-icon-152x152-precomposed.png" type="image/png" sizes="152x152">
<link rel="apple-touch-icon-precomposed" href="/apple-touch-icon-120x120-precomposed.png" type="image/png" sizes="120x120">

<!-- google tv favicon -->
<link rel="icon" href="/favicon-96x96.png" sizes="96x96" type="image/png">Please note that you must change the <span class="attribute">href</span> attribute value based on the location of your favicon file, either in your host or in your project folder if you're working locally. And the naming matters; otherwise, the browser can not detect it.
In the end, it is worth noting that you can use this open-source link which is a cheat sheet for favicon and has valuable information that may help you along the way.